
UV Borescope for Crack Detection: PT & NDT Basics
Surface cracks on a weld, an engine block, or a pipeline rarely announce themselves. Under normal light, a hairline crack can look like a machining mark — until it grows into a leak or a failure. That's why non-destructive testing (NDT) teams rely on fluorescent penetrant inspection (FPI), and why a UV borescope has become one of the most practical tools for finding cracks in places the eye can't reach.
This guide explains how fluorescent crack detection works, where UV borescopes are used, how to run a basic inspection, and what to check before buying one.
What Is Fluorescent Penetrant Inspection (PT/FPI)?
Fluorescent penetrant inspection is a classic NDT method for finding surface-breaking defects — cracks, porosity, laps, and seams — on non-porous materials such as metals and some plastics.
The process is simple in principle:
- Clean the surface so nothing blocks the penetrant.
- Apply penetrant, a liquid dye that seeps into surface cracks by capillary action.
- Remove the excess penetrant from the surface — without pulling it out of the cracks.
- Develop, applying a developer that draws trapped dye back out of any defect.
- Inspect under UV (black) light. Fluorescent dyes glow bright green-yellow under UV illumination, so even a crack a fraction of a millimeter wide shows up as a sharply defined glowing line.
Compared with visible-dye penetrant testing, fluorescent penetrant is far more sensitive: the human eye detects a glowing indication against a dark background much more easily than a red dye on a gray surface. That's why FPI is the standard in aerospace, automotive, and pressure-equipment inspection.
Why a UV Borescope? The Problem of Hidden Surfaces
Traditional FPI works on surfaces you can see and touch. But many critical components hide their crack-prone areas where no flashlight will reach:
- Engine internals — cylinder heads, combustion chambers, and crankcase areas where thermal cracks start
- Weld roots and internal weld seams in fabricated frames, tanks, and pipework
- Pipeline interiors and fittings, where corrosion and cracking develop out of sight
A UV borescope combines two tools in one: a slim, steerable camera probe that reaches into confined spaces, and integrated UV illumination that makes fluorescent indications glow on-screen. Instead of cutting open an assembly or disassembling an engine "just to look," an inspector can apply penetrant to the suspect area, insert the probe, and review the glowing result in real time — recording video or photos as evidence.
The practical benefits:
- Non-destructive: no cutting, no teardown beyond what penetrant application requires.
- Documented: every indication can be captured as a photo or video for reports and traceability.
- Fast: a suspect weld or cylinder can be checked in minutes, not hours.
Where UV Borescopes Are Used
|
Application |
Typical Targets |
|
Engine inspection |
Cylinder heads, combustion chambers, block surfaces — thermal and fatigue cracks |
|
Welding QA |
Internal weld seams and roots in frames, tanks, and structures |
|
Pipeline & plant maintenance |
Interior pipe surfaces, fittings, and flange areas for stress cracks |
|
General NDT support |
Any penetrant-tested area too deep or narrow for direct viewing |
How to Run a Basic UV Crack Inspection with a Borescope
This is a simplified field workflow. For code-governed work (aerospace, pressure vessels), always follow the applicable NDT procedure and qualification requirements.
Step 1 — Access and clean. Reach the suspect area through the nearest port or opening and clean it so oil, carbon, or scale won't mask indications.
Step 2 — Apply penetrant to the suspect zone. In confined spaces, apply with a brush or aerosol extension to the area you can actually cover, and allow the specified dwell time.
Step 3 — Remove excess and develop. Wipe or rinse the accessible surface as your procedure allows, then apply developer if required.
Step 4 — Dim the area and scan with the UV borescope. Insert the probe slowly. The articulating tip lets you steer the camera head along weld toes, fillets, and chamber walls — the exact geometry where cracks concentrate. Fluorescent indications appear as bright glowing lines or dots on the dark surface.
Step 5 — Record and evaluate. Capture photos/video of every indication, note its location, and evaluate width, length, and shape. Linear indications along weld toes or through-thickness signals generally warrant engineering review.
Pro tip: indications from scratches, tool marks, or surface roughness can look like cracks. Compare suspect areas against a known-good surface, and re-clean and re-test before condemning a part.
What to Look for in a UV Borescope
When comparing models for crack detection work, prioritize:
- True 365 nm UV illumination at the probe tip — 365 nm is the standard wavelength that reliably excites fluorescent penetrant dye; a generic "blacklight" LED often won't. The light must genuinely make dye indications glow, not just brighten the surface.
- Small, steerable probe — a probe in the 8–9 mm range covers most engine, weld, and pipeline access ports.
- Enough probe length for your deepest access path — for many engine and pipeline jobs, a 1.5 m snake tube is the practical sweet spot.
- A screen bright enough for dark-area work and a camera that records — you'll be working in deliberately low light, and indications must be visible and documentable.
- Waterproof, oil-resistant construction — penetrant, developer, and engine internals are all wet, oily environments.
- Modular design with interchangeable probes, so one base unit can cover different diameters and lengths as your jobs change.
Recommended: Ralcam M508U UV Inspection Borescope
The Ralcam M508U is purpose-built for fluorescent penetrant work in engines, welds, and pipelines:
- 365 nm UV illumination — the standard wavelength for fluorescent penetrant indications
- 1.5 m snake tube — reach deep access paths in engines, weldments, and pipework
- Modular body with interchangeable probes — one base unit, different probe setups as the job changes
- 5-inch built-in screen — evaluate indications right at the machine, no phone required
- 8.5 mm articulating probe — sized for common engine, weld, and pipeline access ports
👉 View the M508U on ralcam.com → https://www.ralcam.com/products/m506-modular-borescope-interchangeable-probesNot sure which inspection camera fits your job? Browse all inspection borescopes.
FAQ
Q: Can a UV borescope detect cracks without penetrant?
A: It can reveal large surface defects and corrosion under visible light, but small cracks glow only with fluorescent penetrant applied. UV illumination + penetrant together is what makes hairline cracks visible.
Q: Why is 365 nm the standard for fluorescent penetrant inspection?
A: Fluorescent penetrant dyes are formulated to fluoresce brightest under long-wave UV centered around 365 nm. At this wavelength indications appear bright and well-defined against a dark surface, which is why FPI lamps and UV borescopes are built around it.
Q: Is fluorescent penetrant inspection destructive?
A: No. PT/FPI is a non-destructive method — the penetrant is applied to the surface and cleaned off. The part is not cut, heated, or stressed by the test itself.
Q: Do I need certification to use a UV borescope?
A: For in-house preliminary checks, no. For code-governed inspections (aerospace, pressure equipment), the inspector and procedure must meet the applicable NDT qualification standards.
Looking for the right borescope?
Browse the full Ralcam range — industrial and automotive inspection cameras for every job.
Shop all borescopes →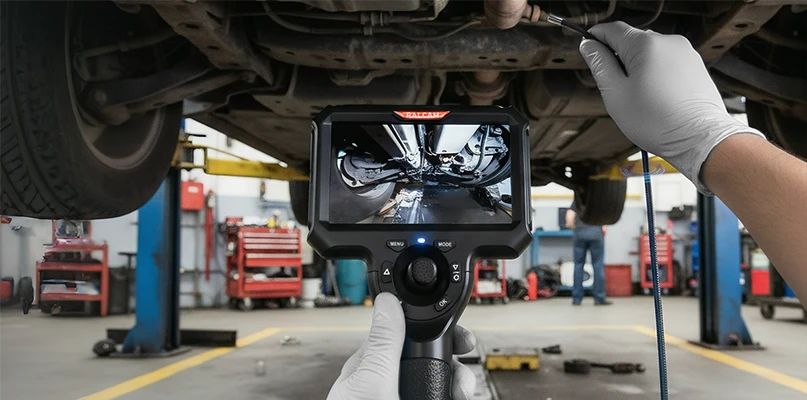
Leave a comment